
This should be the best installation tips for e-bike conversion kit
How to install ebike conversion kit? It might be the first one that comes across your mind when buying them for the first time. The e-bike conversion kit improves the good riding aspect and reduces the difficulty. However, an important thing you need to consider before enjoying this e-bike conversion kit is installing the e-bike conversion on your bike. So we’ve created an e-bike conversion installation guide to help you understand the different types of fittings and what to consider before making a decision. Let’s take a look at how to install ebike conversion kit!
Step 1: Selecting the Battery Pack
Choosing a battery pack is pretty challenging. There are many types to choose from; cell manufacturer, voltage, and amp-hour rating. The motor will determine the allowable voltage range. Thus, it is important to get the fit of the battery pack.
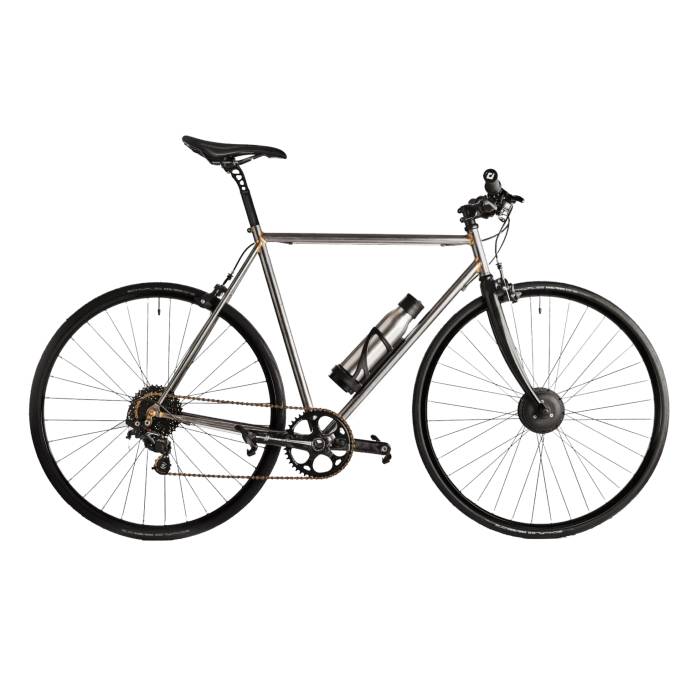
The amp-hour (ah) rating of the pack will determine how far it can go on a single charge. The Zoomy Bike Pathfinder Series All-In-One E-Bike Conversion Kit can be a good choice for optimal performance. It comes with >80% efficiency, so you’ll be riding for years to come.
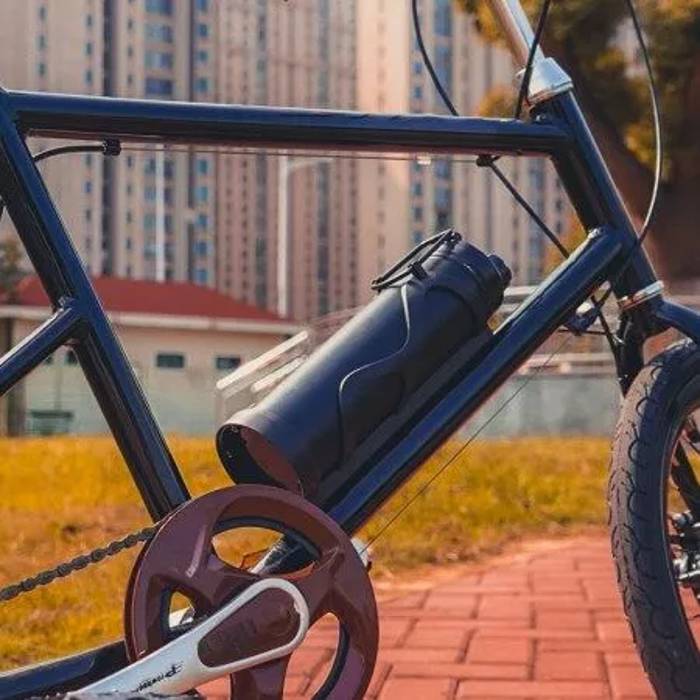
If you are done choosing the right battery for your bike, next, it will be installed in the drink bottle holder on the bike frame. So it will look like a water bottle.
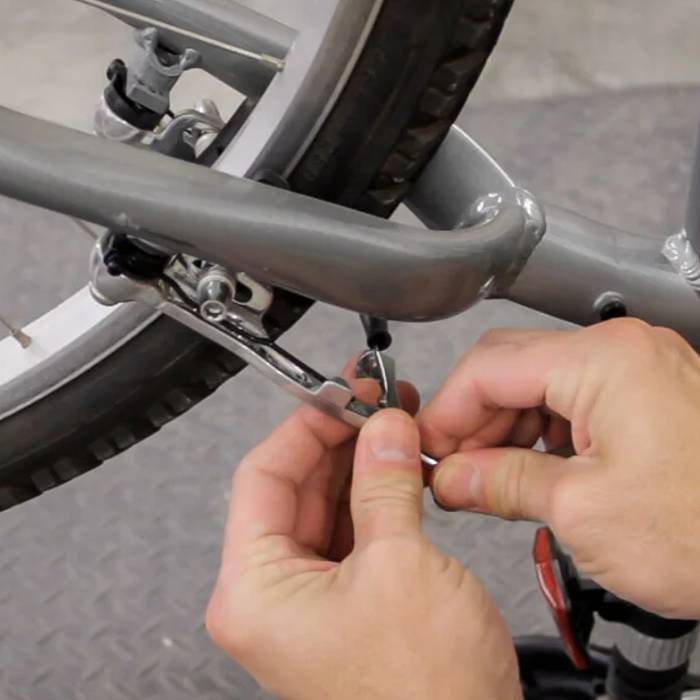
Step 2: Removing the Rear Wheel
You must first remove the rear wheel to install the hub motor. To remove the rear wheel, you can start by loosening the brake cable and then the wheel quick-release lever. Then, hold down the rear gear shifter while lifting the wheel to remove it.
You can use a freewheel removal tool and a 1″ socket to remove the freewheel. If you plan to reuse your existing tube and tire, you can deflate the tire and use a set of tire levers from a small bike kit to remove the tire.
Step 3: Installing the Tire & Freewheel
After moving the tube and tire to the wheel, you can attach the freewheel to the Magic Pie hub. Make sure you use the included washers as spacers to prevent the freewheel from binding.
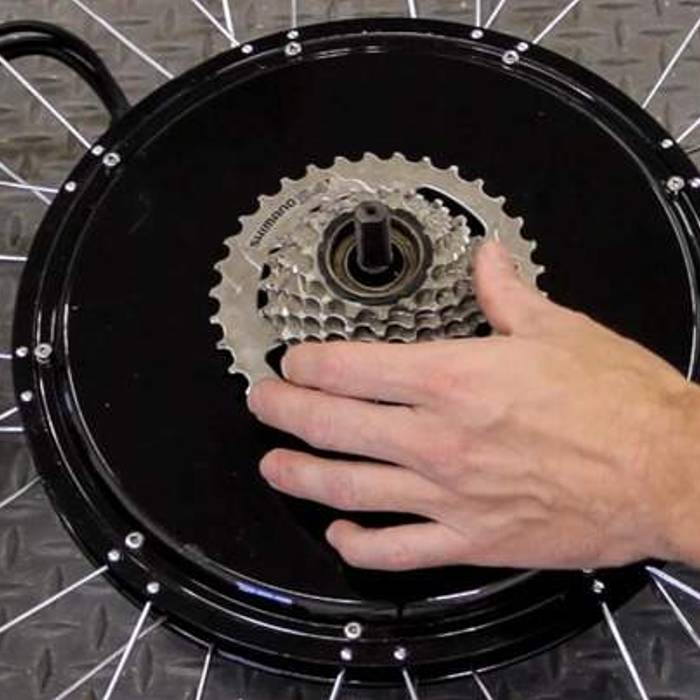
Remember to remove the freewheel from the motor. You must widen the hole through the freewheel removal tool with a 9/16″ drill bit, as the shaft is quite thick.
Step 4: Installing the New Wheel & Torque Arm
Once you have finished mounting the freewheel on the tire, the next step is to put the wheel back on the bike. Adding the two included washers to the axle on the freewheel side is a good idea. It prevents the freewheel binding from breaking.
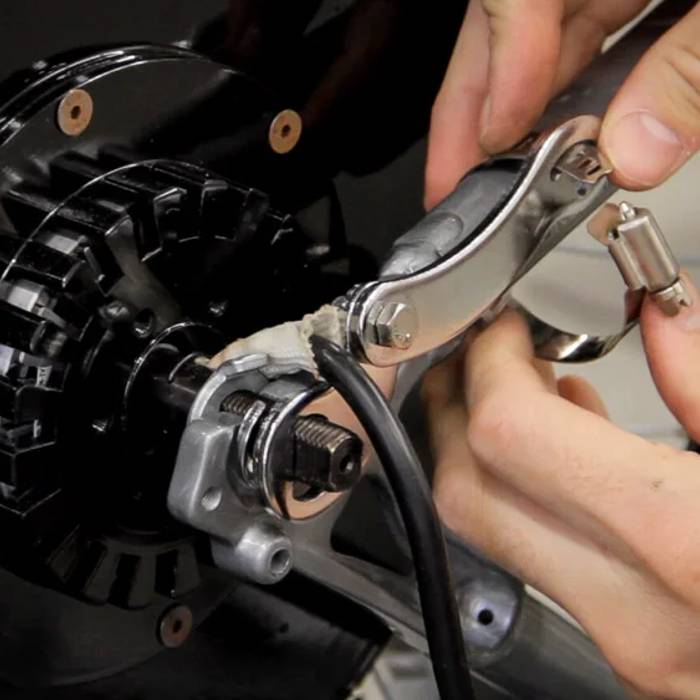
Once the wheel is fully seated in the dropout, you can use the remaining lock washer and secure it with the axle nut outside the dropout.
Step 5: Running Wires
In this case, there are some cables that you need to attach along the bike frame. Thus, you don’t need to rush and remember to secure them with zip ties. Instead, you can loop the cables to avoid cutting the wires to the battery.
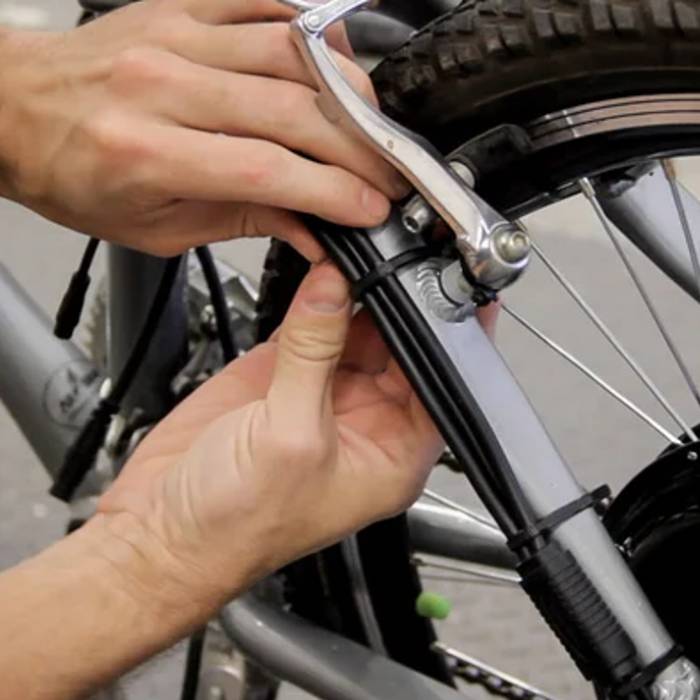
When that step is done, you can connect it directly to the battery holder, which is easily installed in the hole of the water bottle holder.
Step 6: Installing the Display and Controls
Once done with the cables, you must remove the handlebar grips using an air compressor to blow air into the holds. Then you can loosen and remove the shifter and brakes. Next, attach the screen to the middle of the handlebar.

On the left handlebar, you can install the included throttle and e-brake. It works to shut off power to the motor when braking, as well as controls the display. Finally, you can install the cruise control switch on the right handlebar, the remaining electronic brake, and the 7-speed gear shifter.
Step 7: Finishing the Installation
Once you’ve reattached the two handles, reconnected all the brake cables, and done a little wiring, you’re done! The official website revealed that this Zoomy Bike Pathfinder Series All-In-One E-Bike Conversion Kit delivers impressive performance. You can easily reach 30 miles/hour with the throttle alone.
Conclusion
If you’ve never done any real work with a bike before, you might feel that doing an e-bike conversion kit installation would be difficult. However, it’s actually very easy.
In this guide on how to install the e-bike conversion kit, we also include pictures to make it easy for beginners. So far, the e-bike conversion kit has given great results, and it’s certainly a lot more fun to ride!